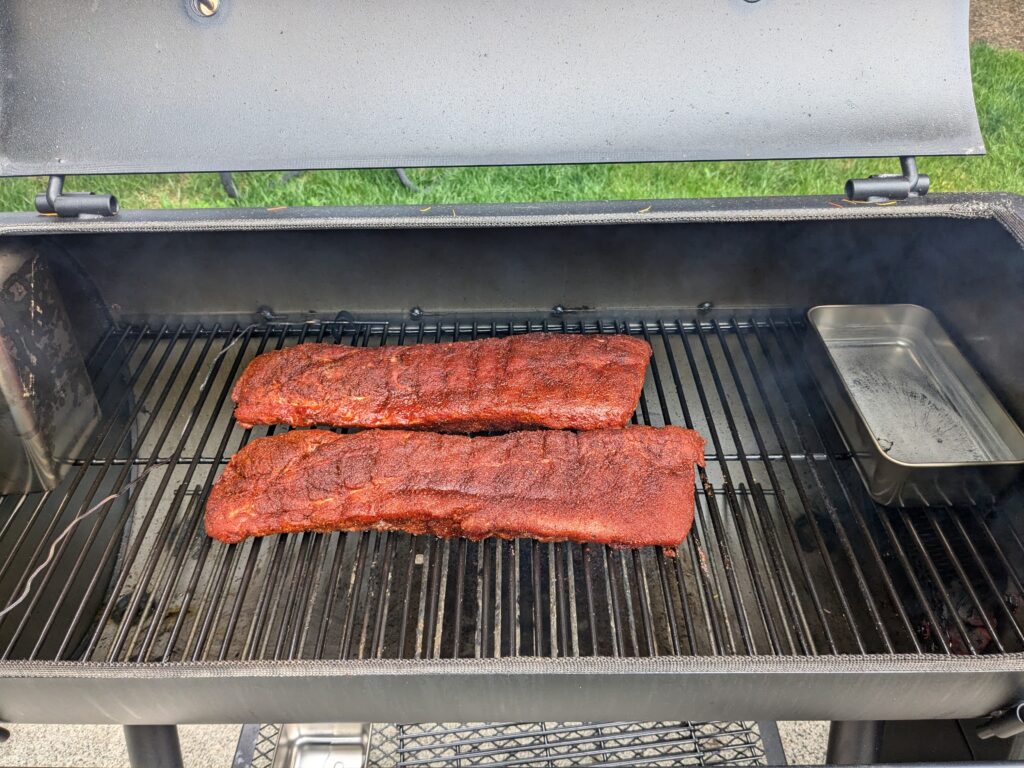
After moving I was left with just one gas BBQ, and finally got setup with a new Oklahoma Joe’s offset smoker. I knew there were a lot of suggested improvements for these lower-end models (ex: https://www.youtube.com/watch?v=6CstFU78PgY&t=292s) and after watching several YouTube videos and Smoking forums I determined the best path of action for me with the usual goals of saving money.
- Seal all connection points and bolt holes using high-temp RTV silicon during assembly ($13)
- Gasket seal on lid ($15)
- Smoke stack extension ($15)
- Lower exhaust stack intake to grate-level ($17)
- Firebox basket ($24)
- Drip Bucket ($13)
I saved about $85 on Items 3-6 from buying new, which is considerable since these smokers are only $350~$400.
Sealing Smoker – Lava Lock & Gasket Seal
A popular modification was sealing all gaps in the smoker to improve efficiency. Based on videos it was clear the easiest time to do this was during assembly. While putting the smoker together I used high-temp RTV silicon to seal all areas between the firebox and exhaust, this included:
- Both halves of the firebox assembly
- Area where the firebox attaches to the smoker chamber
- All other assembly bolts for handles and attachment points.
I added gasket seal to the smoker lid but left the firebox lid alone. There are two things I’ve noticed with doing this and in my research to get a good seal:
- Don’t use seal on the entire lid – but look for where it sits naturally well sealed to the chamber vs needs extra seal. I think you could get a good seal only doing some of the lid without clamps.
- Add LavaLock clamps to ensure a complete seal
Smoke Stack Extension
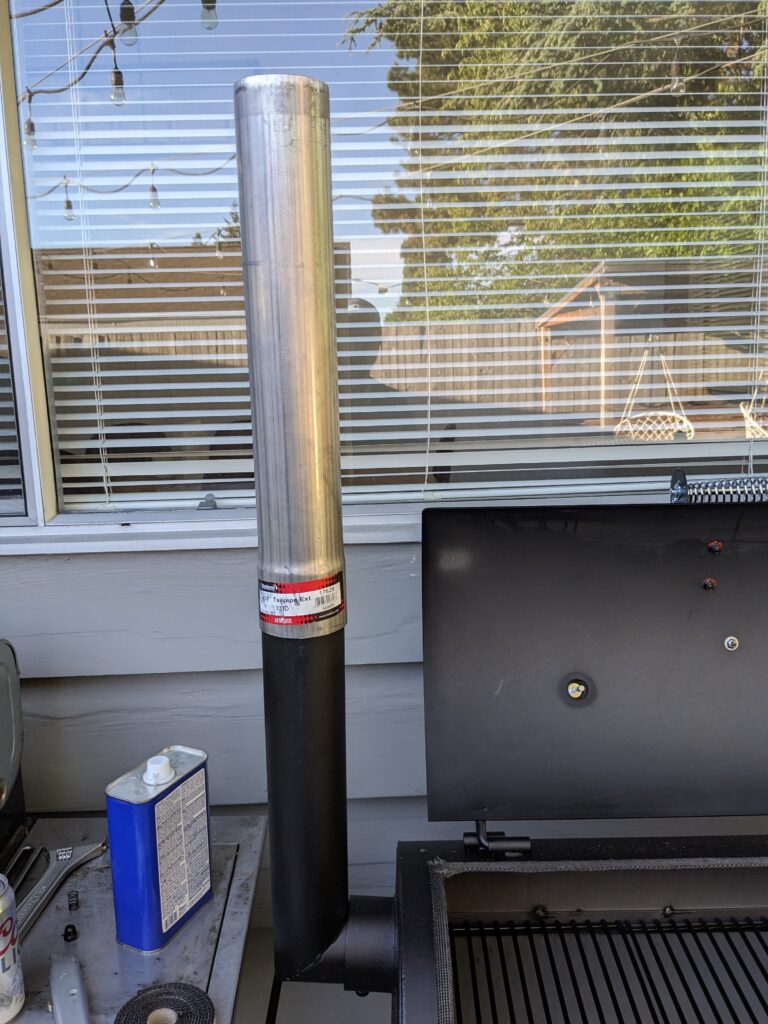
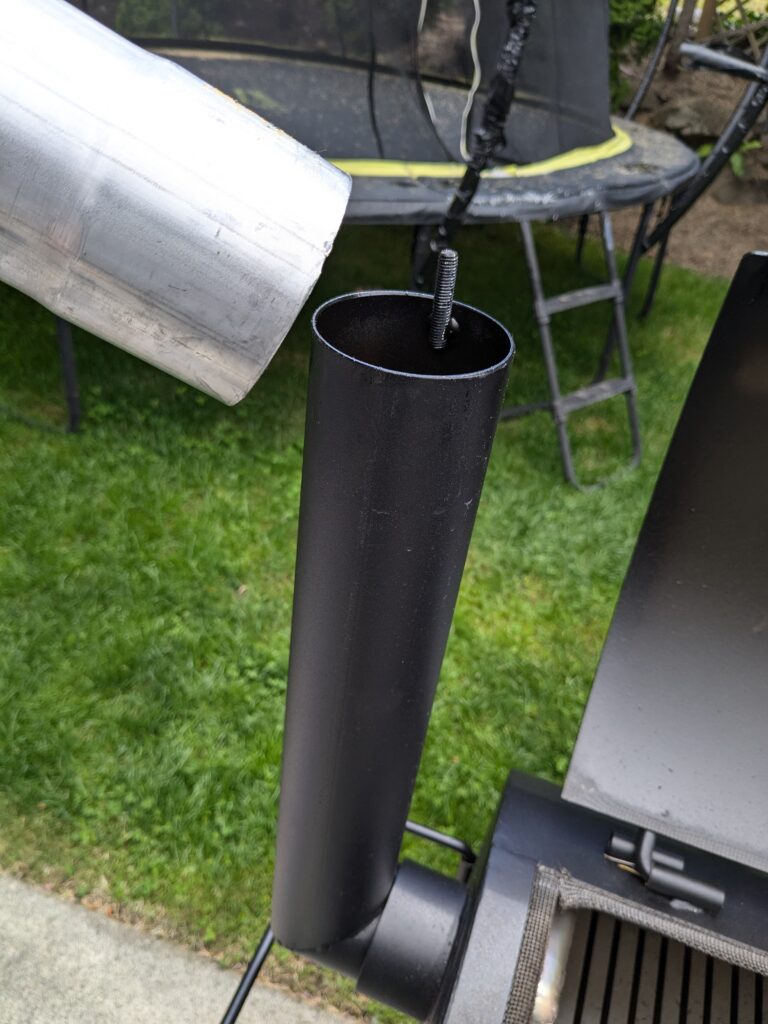
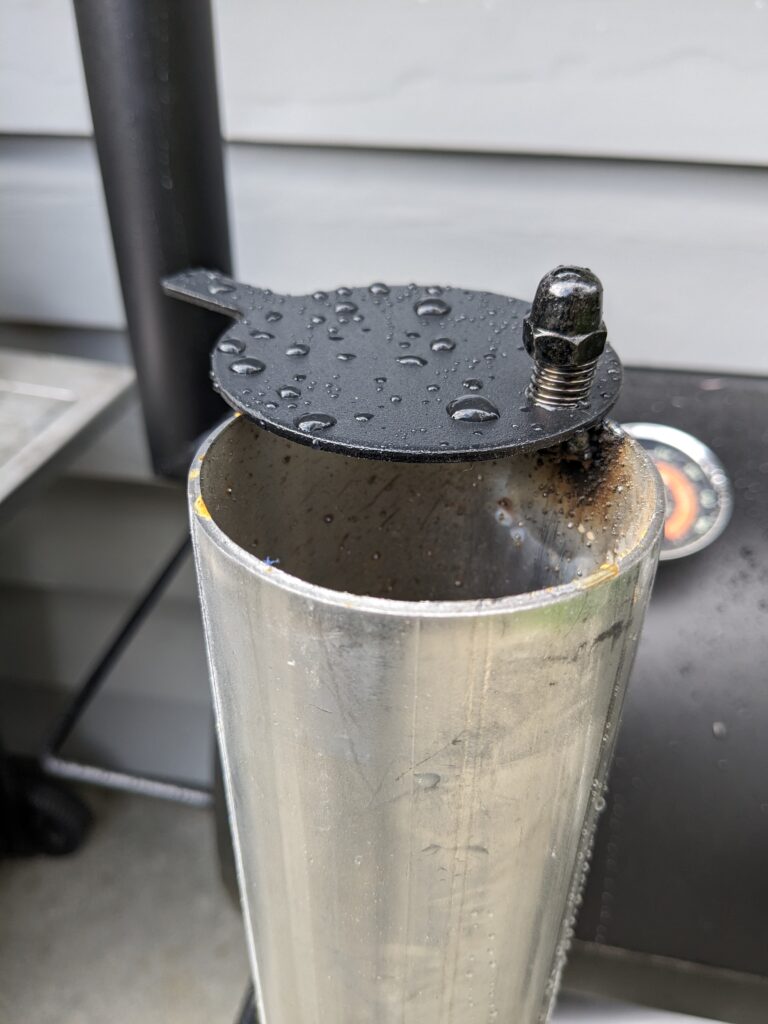
This part is where I really had sticker shock: Smoke Stack Extension for $76.99, there are several youtube videos trying out different forms of vent pipe. Most anything you find that’s metal will be fine since the real temps this reaches are probably less than 300deg F. On a few forums I saw mention of using automotive exhaust pipe and that’s exactly what I found that worked perfectly https://www.reddit.com/r/OklahomaJoe/comments/o28up6/smoke_stack_extension_made/.
- https://www.oreillyauto.com/detail/c/nickson/exhaust/tail-pipes–universal-/0f3484ac89ae/nickson-tail-pipe/nic0/548628?
- https://www.autozone.com/emission-control-and-exhaust/exhaust-pipe-adapter-connector/p/surebilt-3in-i-d-tailpipe-extension/258995_0_0?
This fit perfectly over the current stack, the only additional piece was re-attaching the stack damper. I just found a bolt the same thread as existing lock nut and poorly welded it to the inside so that it worked the same as the original stack, and retained the existing thread on the stack. There are likely many ways to do this without welding that will work good enough, and save you that $50.
Lower smokestack exhaust point.
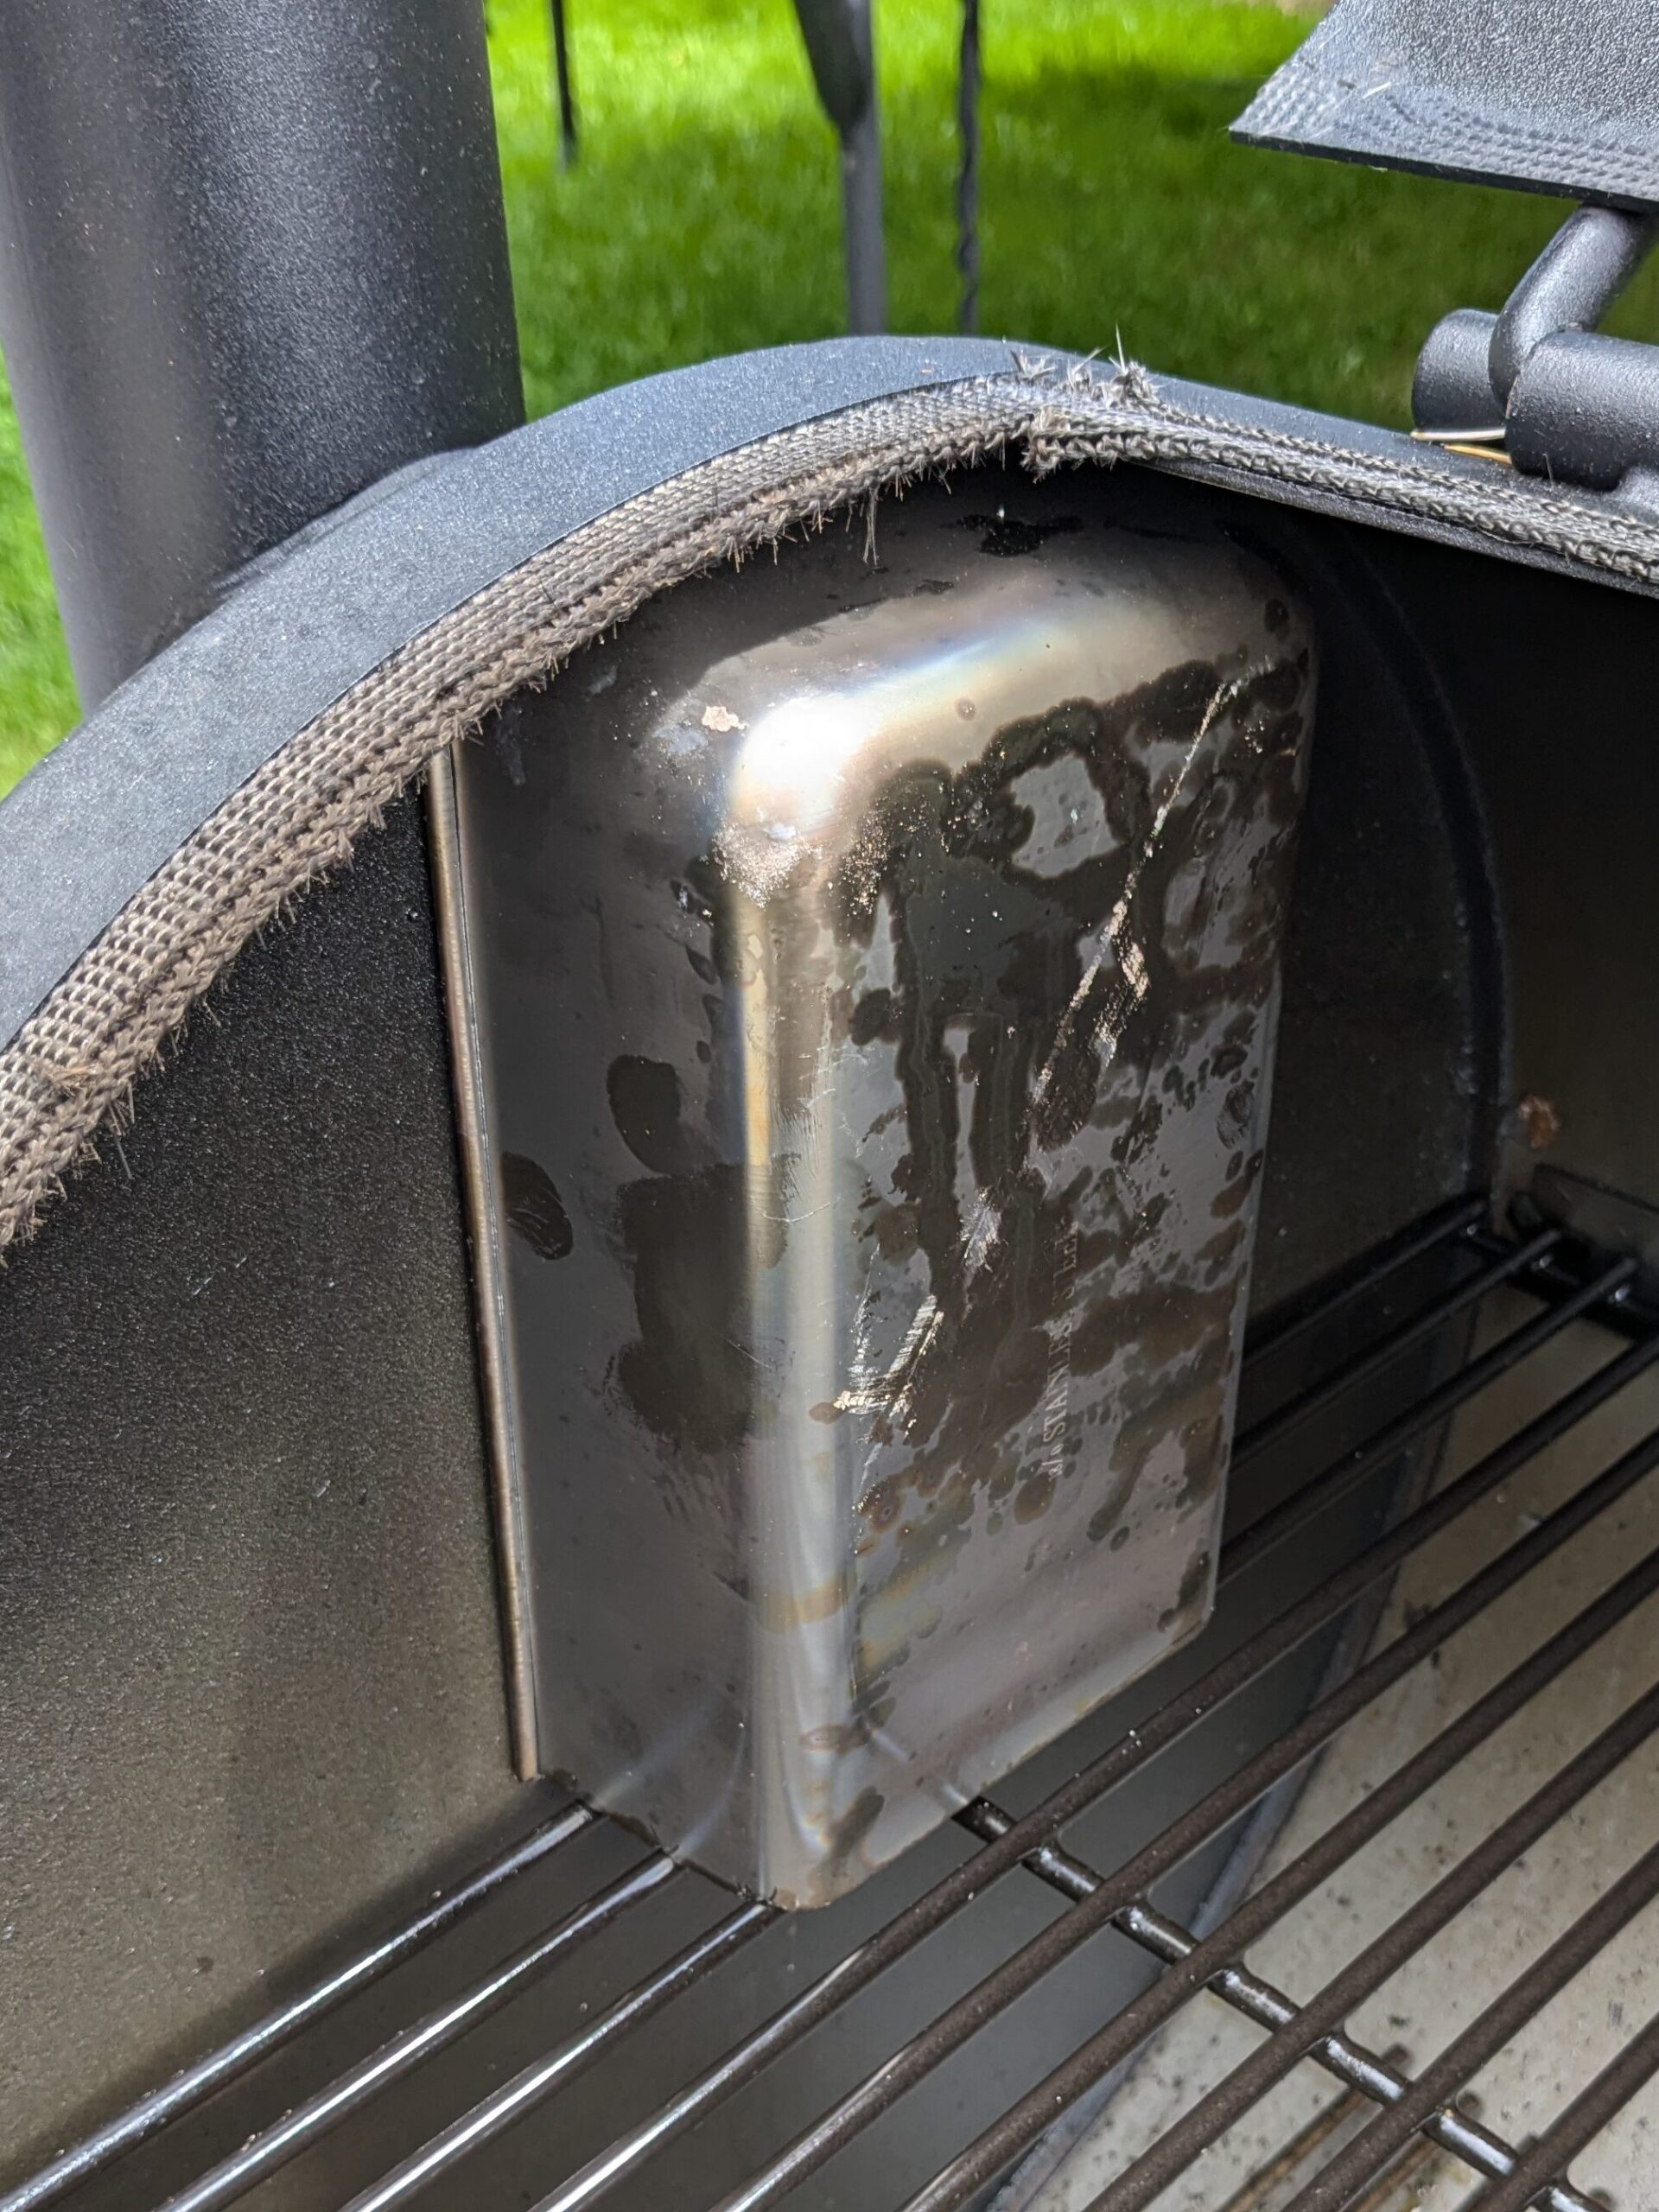
Another modification related to airflow this also appeared to be a differentiator between the lower-end and higher-end smoker models. This simple modification lowers the exit point of the smoke into the smokestack to get a more even cooking temperature across the entire grate. There is this official “lowering” kit https://bbqsmokermods.com/lavalockr-smoke-stack-lowering-kit-for-oklahoma-joe-s-highland.html, and plenty of people using a dryer-vent elbow or other metal elbow. The simplest versions I saw used some kind of loaf pan, and I found some basic stainless pans: Stainless Steel Loaf Pan 9 x 5 inch. Benefit of plain stainless is they shouldn’t have any bad off-gas, and I can use the other two as water pans right over the firebox to modulate temperature. For now I just cut the bottom of the pan off to where it rests on the grate, up and over the exhaust – the friction from leaning slightly against the wall is enough to hold it in place.
Firebox Basket
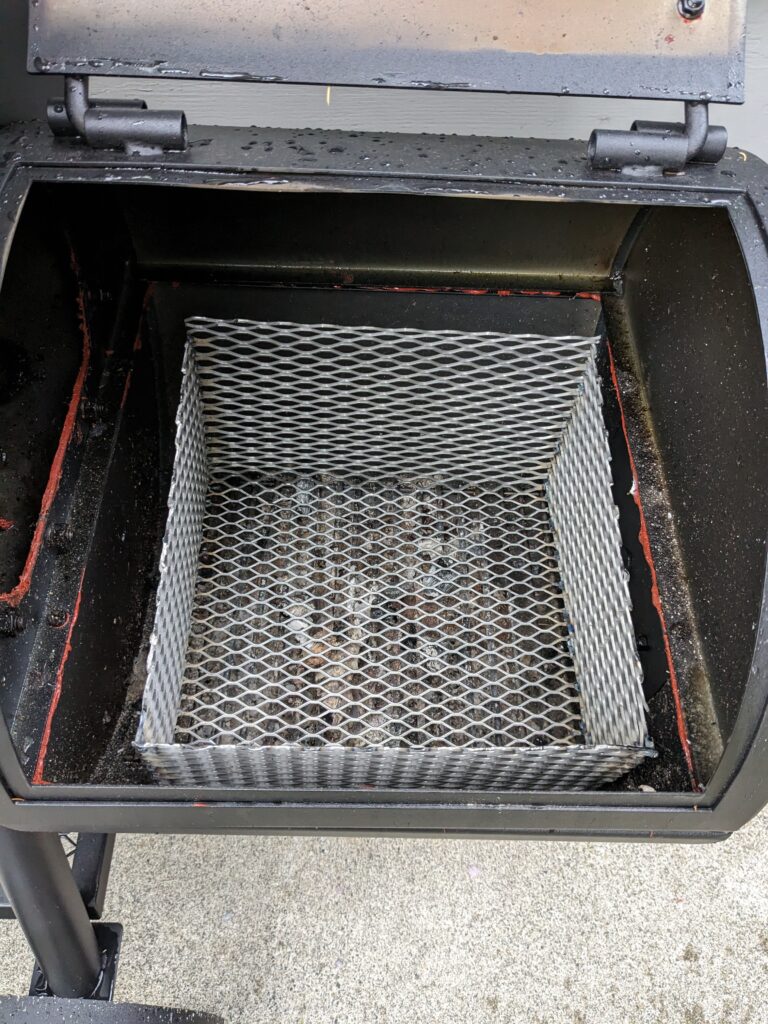
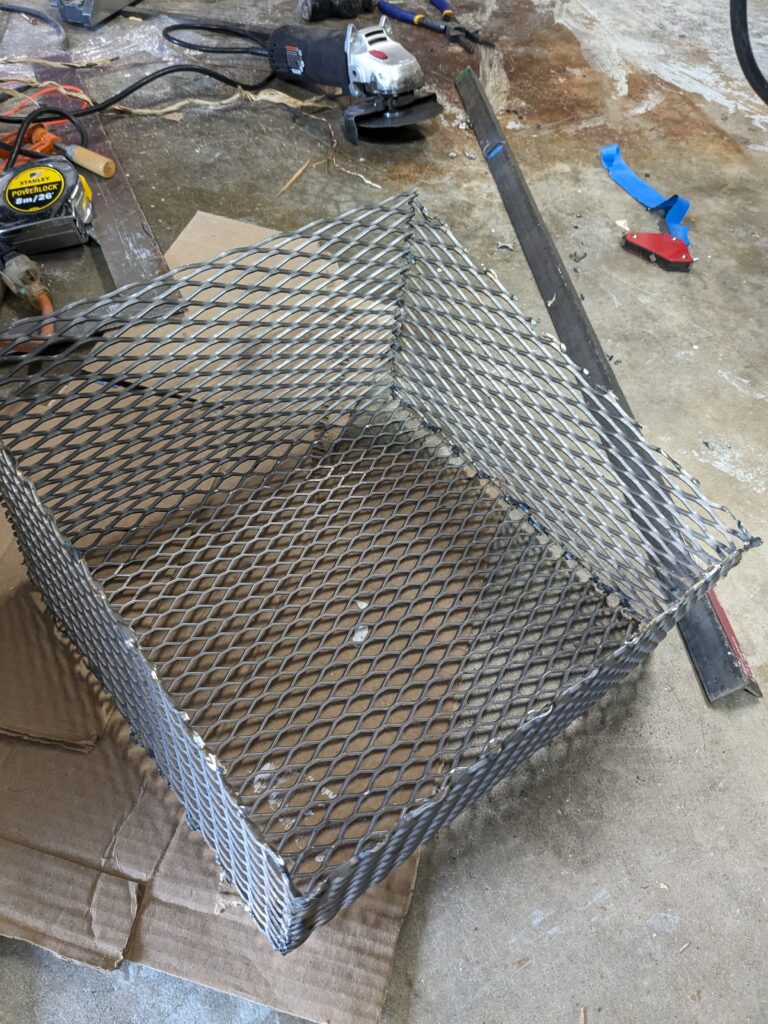
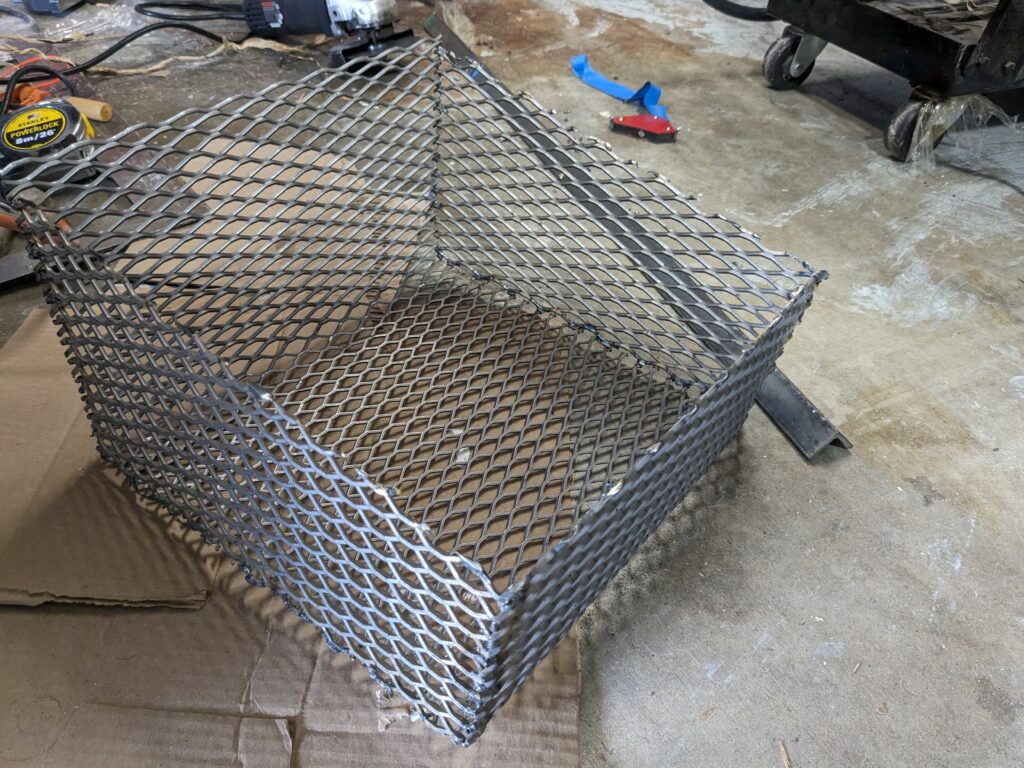
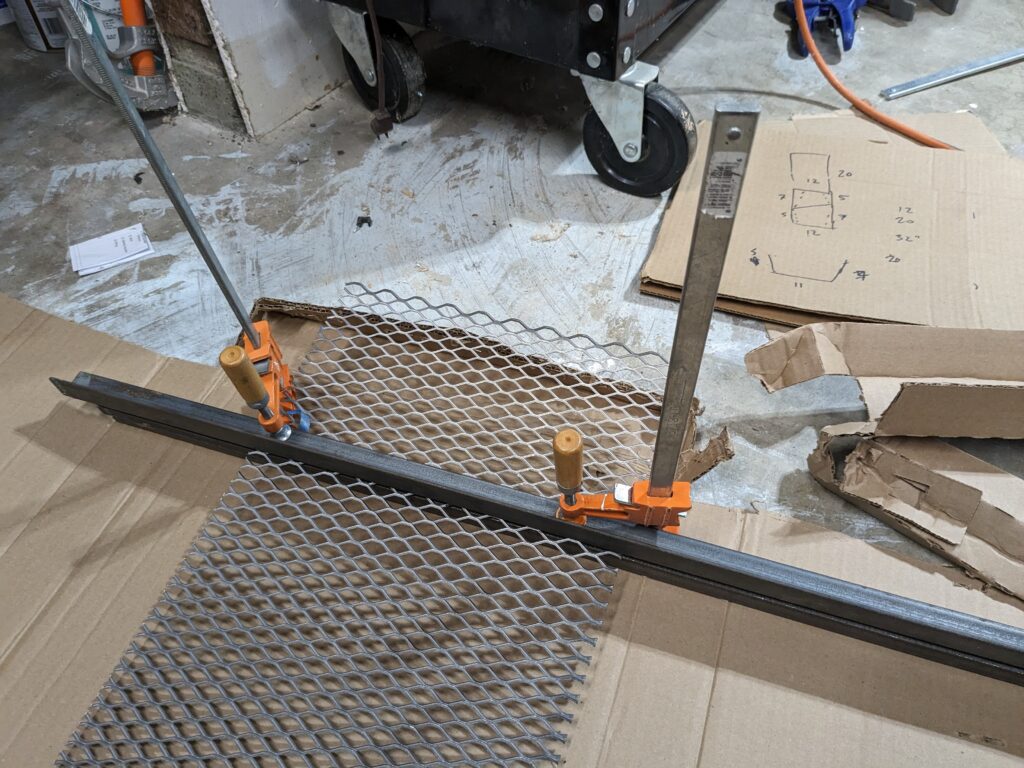
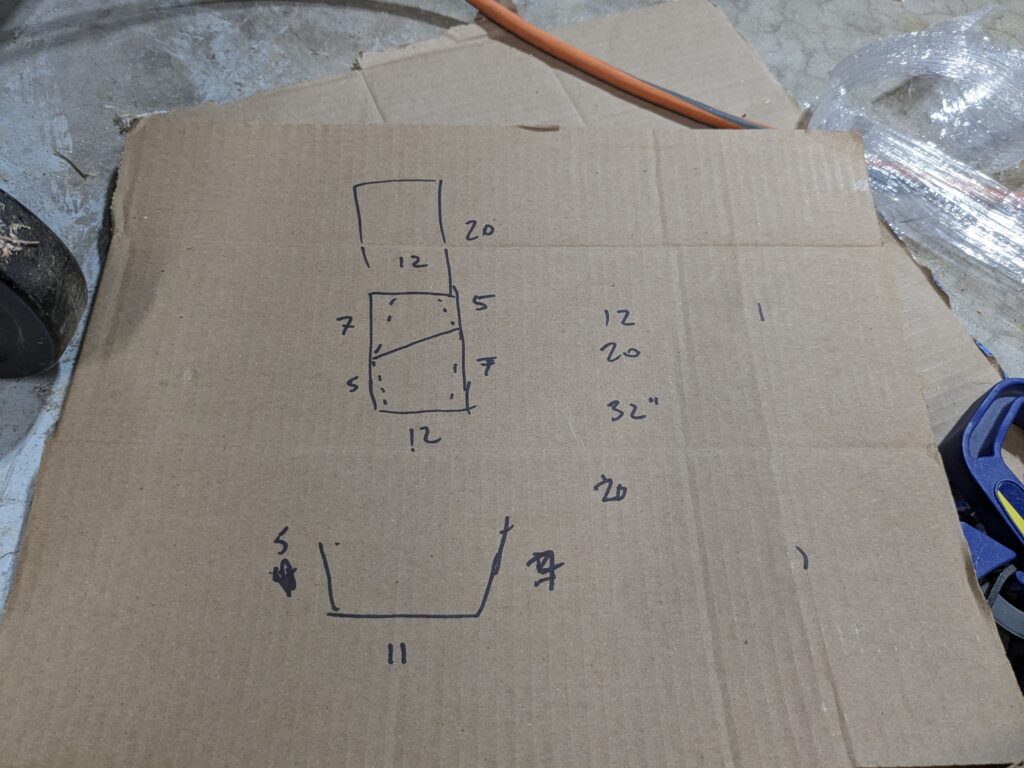
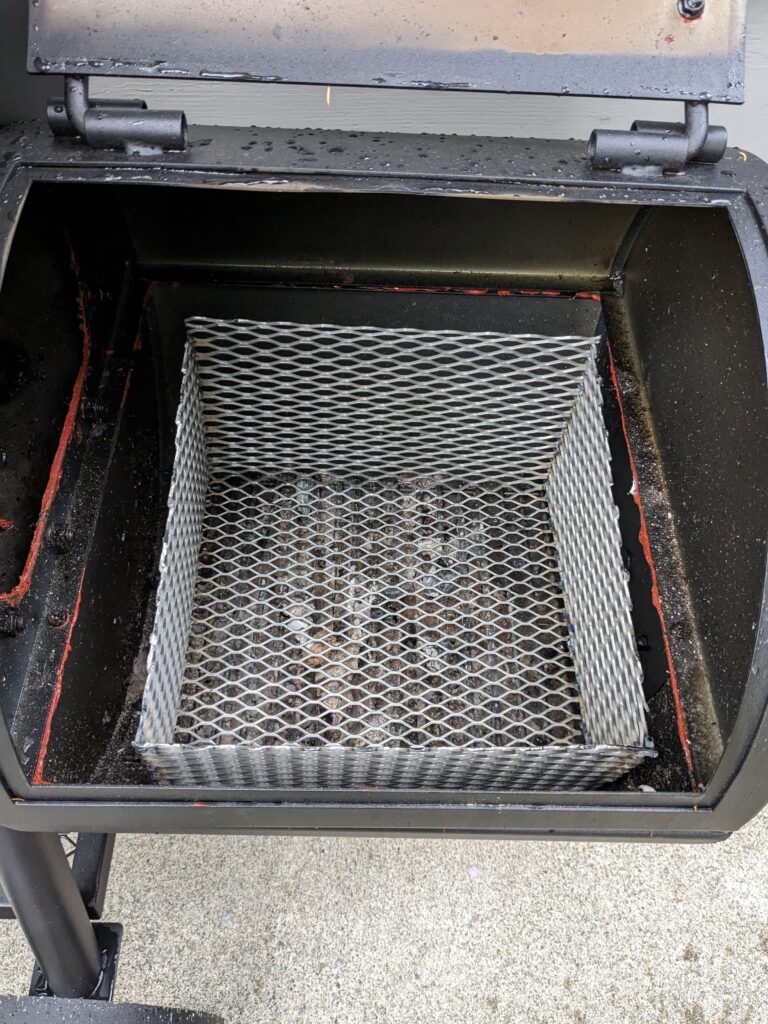
Some kind of firebox basket will help keep the fire from prematurely wearing your firebox, and allow more airflow around your fire. There are nice official baskets: Firebox basket, but seemed like a high price for something that will also rapidly deteriorate. I chose to use expanded steel as I’d seen a few examples of this, the size of your firebox will determine how much you’ll need. I went ahead and welded it together but you could easily just use some wire to fasten the edges together.
My sheet was 12″ x 48″ and I was left with about 11″. Most big box stores will sell sheets in either 24″ or maybe 36″ length but I wanted something that was the full height and enough for sides. With shipping Online Metals had thicker gauge metal for less than having to buy two sheets at home depot: https://www.onlinemetals.com/en/buy/carbon-steel/0-5-hole-x-%2318-carbon-steel-expanded-a36-standard/pid/22553.
- Measure your ideal front, and back height – fold your expanded steel at these points and cut off the excess. The 12″ width sheet was perfect for the width of the firebox s
- Using the remainder and/or another sheet, cut sides that will form the shape of your basket, mine were slightly trapezoidal vs square so the basket would be smaller on the bottom than on top.
- The sides will help hold the shape of your bent piece, either weld or use wire to tie them together.
Drip Bucket
While I liked the idea of an official Oklahoma Joe’s Drip Bucket, similar non-Oklahoma Joe’s pails were still in the $6~$12 range and I’d still have to clean it? I opted for a readily available, disposable version:
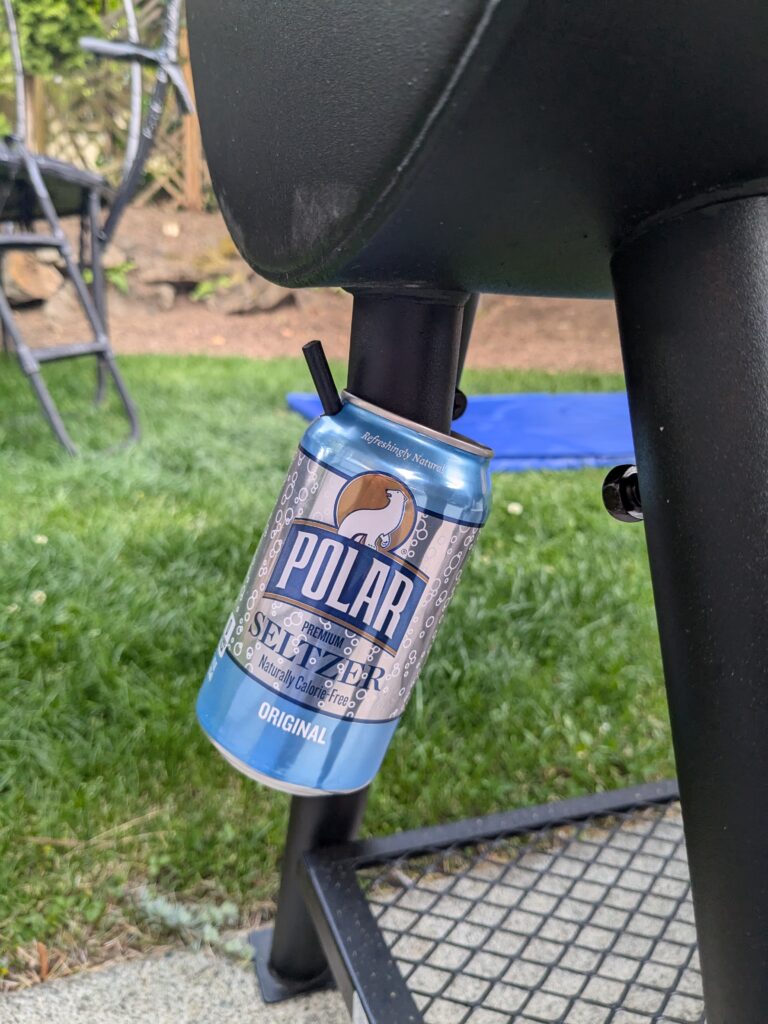
Results
I’ve only gotten to run the smoker once for ribs, but I feel like I’m in a good place where I can focus on cooking than improving the $350 smoker. For which I bought a multi-probe BBQ thermometer so I can more closely monitor internal temps in multiple locations + the food.
